Spring Legacy Project 세팅 및 실행하기
2022. 7. 4. 18:02ㆍJava/Spring
반응형
IntelliJ 사용, Java 1.8 사용, tomcat 8.0.25 사용
프로젝트 생성
pom.xml - dependency 설정
https://debut12.tistory.com/29
Spring - pom.xml에 dependency 세팅하기
Maven Repository 사이트 : https://mvnrepository.com/ Maven Repository: Search/Browse/Explore Eureka Plugin Last Release on May 22, 2022 mvnrepository.com 프로젝트에서 사용했던 dependency들을 적어놓..
debut12.tistory.com
- spring-framework-bom
- version 관리 dependency
- `bom`을 dependencyManagement에서 설정해두면 이후 같은 groupId를 갖는 dependency들은 자동으로 version 관리가 된다.
- IntelliJ에서는 자동으로 버전을 선택할 수 있지만, eclipse/sts의 경우에는 'maven repository'에서 직접 가져와야 한다.
- spring-web
- spring-webmvc
더보기

spring-framework-bom dependencyManagement 설정 / spring-web, spring-webmvc dependency 설정

maven update button 클릭

- pom.xml에 dependency 추가 시에는 반드시 Maven Update를 해줘야 한다.!!

<?xml version="1.0" encoding="UTF-8"?>
<project xmlns="http://maven.apache.org/POM/4.0.0"
         xmlns:xsi="http://www.w3.org/2001/XMLSchema-instance"
         xsi:schemaLocation="http://maven.apache.org/POM/4.0.0 http://maven.apache.org/xsd/maven-4.0.0.xsd">
    <modelVersion>4.0.0</modelVersion>

    <groupId>com.ex</groupId>
    <artifactId>example</artifactId>
    <version>1.0-SNAPSHOT</version>

    <dependencyManagement>
        <dependencies>
            <!-- https://mvnrepository.com/artifact/org.springframework/spring-framework-bom -->
            <dependency>
                <groupId>org.springframework</groupId>
                <artifactId>spring-framework-bom</artifactId>
                <version>5.2.22.RELEASE</version>
                <scope>import</scope>
                <type>pom</type>
            </dependency>
        </dependencies>
    </dependencyManagement>

    <properties>
        <maven.compiler.source>8</maven.compiler.source>
        <maven.compiler.target>8</maven.compiler.target>
    </properties>

    <dependencies>
        <!-- https://mvnrepository.com/artifact/org.springframework/spring-web -->
        <dependency>
            <groupId>org.springframework</groupId>
            <artifactId>spring-web</artifactId>
        </dependency>
        <!-- https://mvnrepository.com/artifact/org.springframework/spring-webmvc -->
        <dependency>
            <groupId>org.springframework</groupId>
            <artifactId>spring-webmvc</artifactId>
        </dependency>
    </dependencies>
</project>
web.xml 만들기
- 프로젝트에서 우클릭 > Add Framework Support...

- 'Web Application' 체크박스 선택 > OK

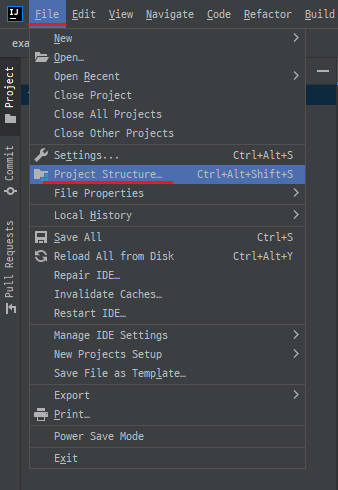
Project Structure 설정
File > Project Structure... 클릭
Compiler output 내용 삭제하기
- out 폴더가 있을 때 필요없는 오류가 난 적이 있어서 왠만하면 지우고 하는 편.

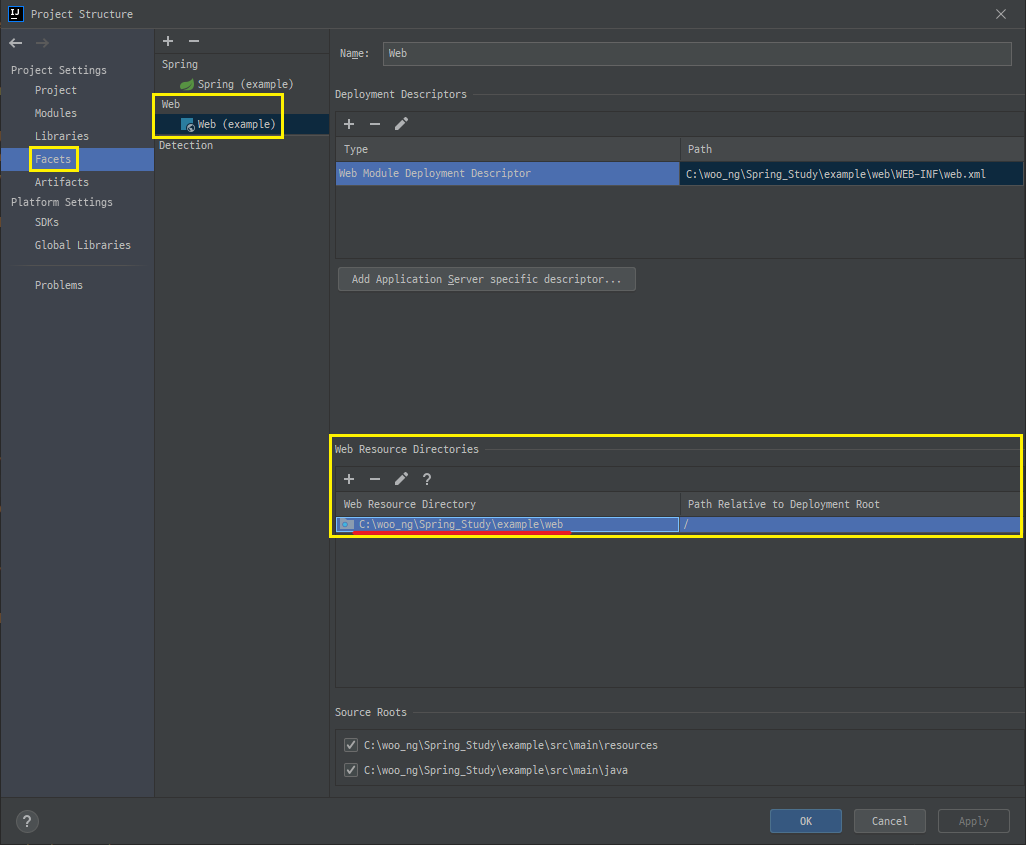
Facets에서 Web 선택 > Web Resource Directories의 빨간줄 부분 경로 변경하기
- webapp 폴더 생성하기

- 기존 : C:\woo_ng\Spring_Study\example\web
- 변경 : C:\woo_ng\Spring_Study\example\src\main\webapp
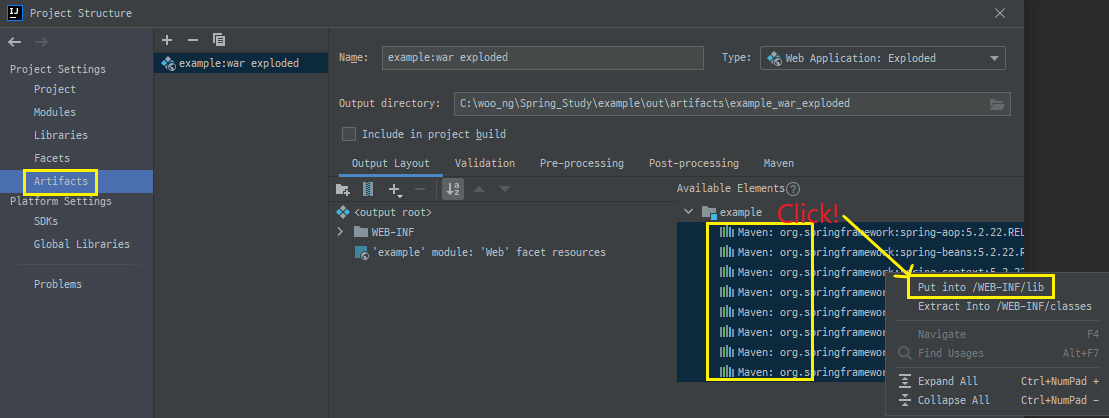
- Artifacts > 오른쪽 부분에 있는 모든 Maven 관련 선택 후 우클릭 > Put into /WEB-INF/lib 선택
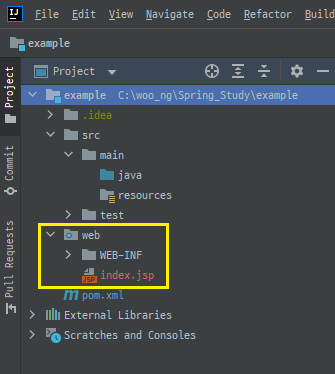
WEB-INF & index.jsp 위치 변경하기
- 기존 : example/web/WEB-INF & index.jsp
- 변경 : src/main/webapp/WEB-INF & index.jsp
- web 폴더 삭제하기
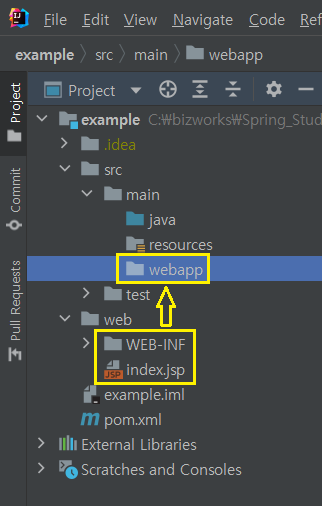
web.xml 코드 작성하기
- DispatcherServlet 추가하기
<?xml version="1.0" encoding="UTF-8"?>
<web-app xmlns="http://xmlns.jcp.org/xml/ns/javaee"
         xmlns:xsi="http://www.w3.org/2001/XMLSchema-instance"
         xsi:schemaLocation="http://xmlns.jcp.org/xml/ns/javaee http://xmlns.jcp.org/xml/ns/javaee/web-app_4_0.xsd"
         version="4.0">

	<!-- 사용자의 요청을 받아서 적절하게 처리를 분배하기 -->
	<!-- Processes application requests -->
	<servlet>
		<servlet-name>dispatcher</servlet-name>
		<servlet-class>org.springframework.web.servlet.DispatcherServlet</servlet-class>
		<init-param>
			<param-name>contextConfigLocation</param-name>
			<param-value>/WEB-INF/spring/appServlet/*-context.xml</param-value>
		</init-param>
		<load-on-startup>1</load-on-startup>
	</servlet>
	<servlet-mapping>
		<servlet-name>dispatcher</servlet-name>
		<url-pattern>/</url-pattern>
	</servlet-mapping>
</web-app>
param-value에 설정한 xml 파일 주소대로 파일 생성하기
- /WEB-INF/spring/appServlet/*-context.xml
- appServlet 폴더 생성
- 'servlet-context.xml' 파일 생성
- New > XML Configuration File > Spring Config로 xml 파일 생성하기
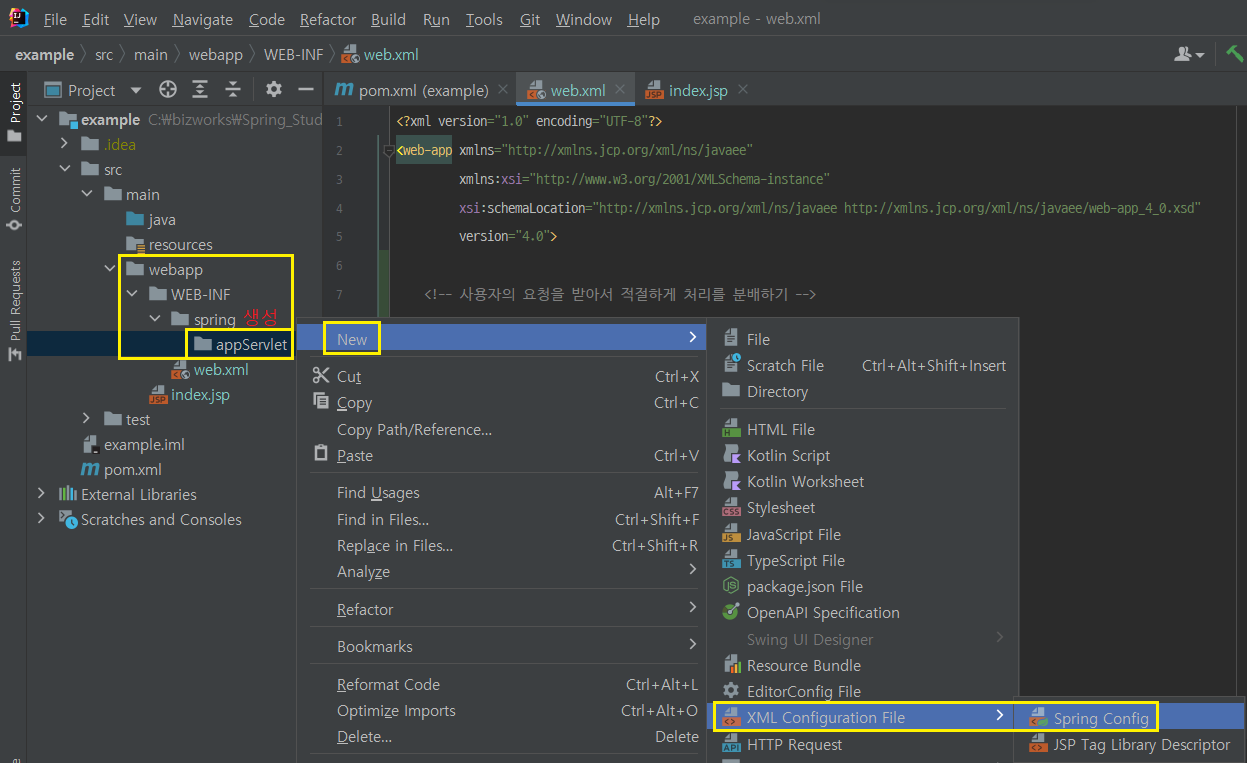
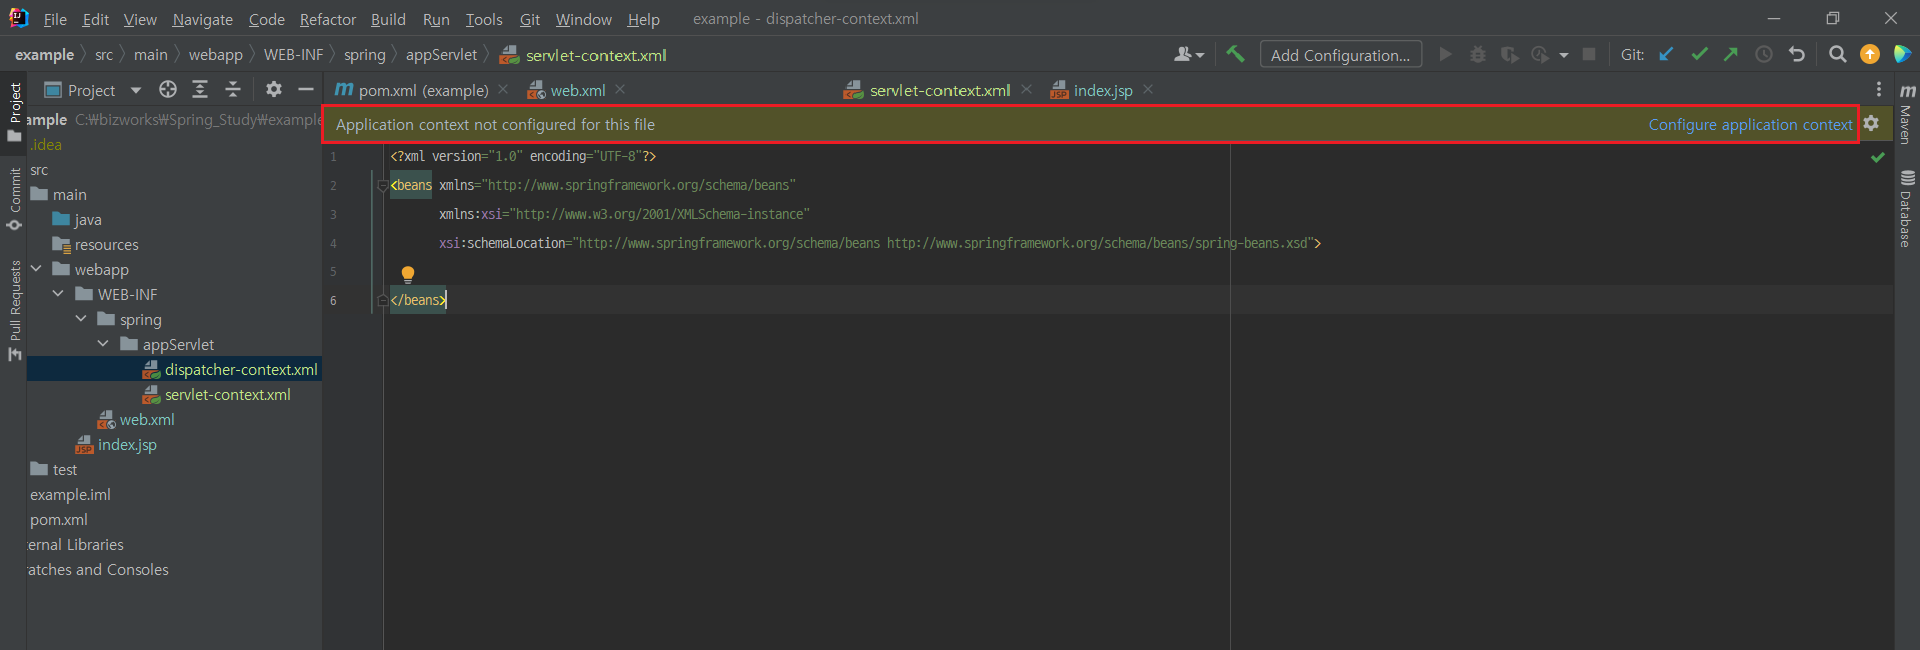
- servlet-context.xml 파일 생성하게 되면 아래와 같이 노란색 경고창이 뜨게 됨.
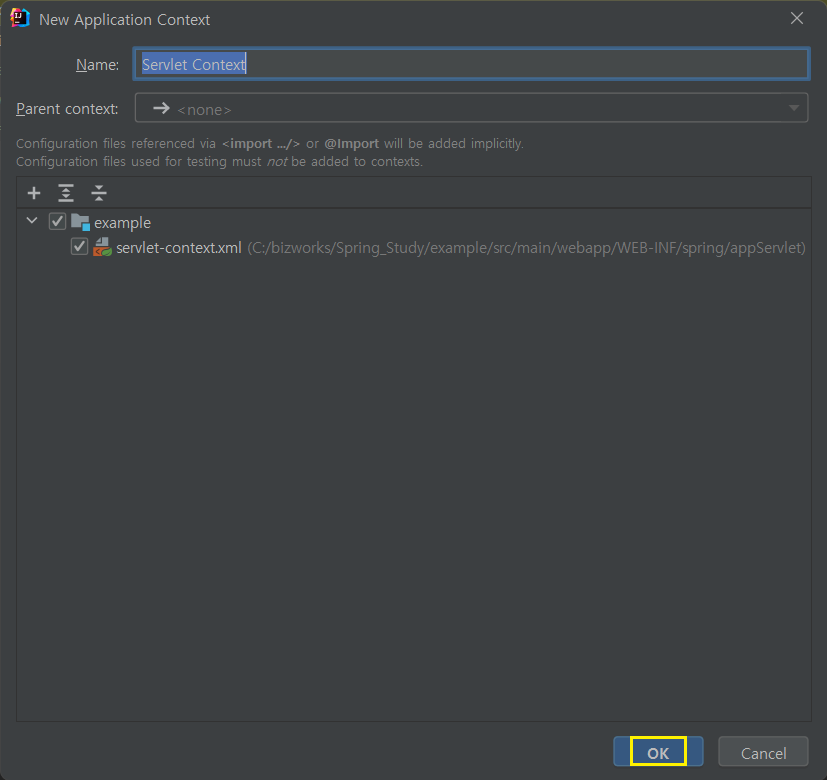
- Configure application context 클릭
- OK~
servlet-context.xml 코드 작성하기
- mvc:annotation-driven 설정하기
- prefix & suffix 설정하기
- context:component-scan 설정하기
<?xml version="1.0" encoding="UTF-8"?>
<beans xmlns="http://www.springframework.org/schema/beans"
	   xmlns:xsi="http://www.w3.org/2001/XMLSchema-instance"
	   xmlns:context="http://www.springframework.org/schema/context"
	   xmlns:mvc="http://www.springframework.org/schema/mvc"
	   xsi:schemaLocation="http://www.springframework.org/schema/beans http://www.springframework.org/schema/beans/spring-beans.xsd http://www.springframework.org/schema/context https://www.springframework.org/schema/context/spring-context.xsd http://www.springframework.org/schema/mvc https://www.springframework.org/schema/mvc/spring-mvc.xsd">

	<mvc:annotation-driven>
		<mvc:message-converters>
			<bean class="org.springframework.http.converter.StringHttpMessageConverter">
				<property name="supportedMediaTypes">
					<list>
						<value>text/html;charset=UTF-8</value>
						<value>text/json;charset=UTF-8</value>
					</list>
				</property>
			</bean>
		</mvc:message-converters>
	</mvc:annotation-driven>

	<bean class="org.springframework.web.servlet.view.InternalResourceViewResolver">
		<property name="prefix" value="/WEB-INF/views/" />
		<property name="suffix" value=".jsp" />
	</bean>

	<context:component-scan base-package="com.ex.example" />
</beans>- 여기서 base-package에서 빨간색 뜰 때 :: 해당 폴더를 찾을 수 없음.
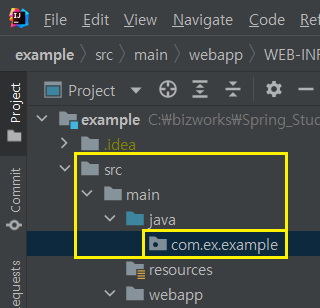
- src/main/java 내에 com.ex.example 폴더 생성하기
- 여기서 com.ex.example은 base-package 폴더와 동일.
HomeController 생성
- 주소 : com.ex.example.HomeController
- Annotation 사용 : Controller, ResponseBody, RequestMapping 설정
- ResponseBody annotation 사용함.
- 아무것도 설정해주지 않아서 기본으로 있는 index.jsp 파일이 읽히게 될 것이다.
package com.ex.example;

import org.springframework.stereotype.Controller;
import org.springframework.web.bind.annotation.RequestMapping;
import org.springframework.web.bind.annotation.RequestMethod;
import org.springframework.web.bind.annotation.ResponseBody;

@Controller
public class HomeController {

	@ResponseBody
	@RequestMapping(value = "/", method = RequestMethod.GET)
	public String home() {
		return "HomeController - home method";
	}
}
Tomcat 설정 및 프로젝트 실행하기
Add Configuration... 클릭

Add new.. > Tomcat Server - Local 선택

Tomcat 등록..?하기
- tomcat setting을 한 번도 하지 않은 사람들은 보통 Unnamed..?가 뜨게 된다.
- 나는 기존에 tomcat 8.0.53을 사용하고 있었기에 아래와 같이 기본 정보가 가져와졌다.
- Unnamed인 사람들의 경우..
- Tomcat 다운 > 빨간색 박스로 되어 있는 Configure... 선택 > 다운받은 Tomcat 폴더 선택 후 OK

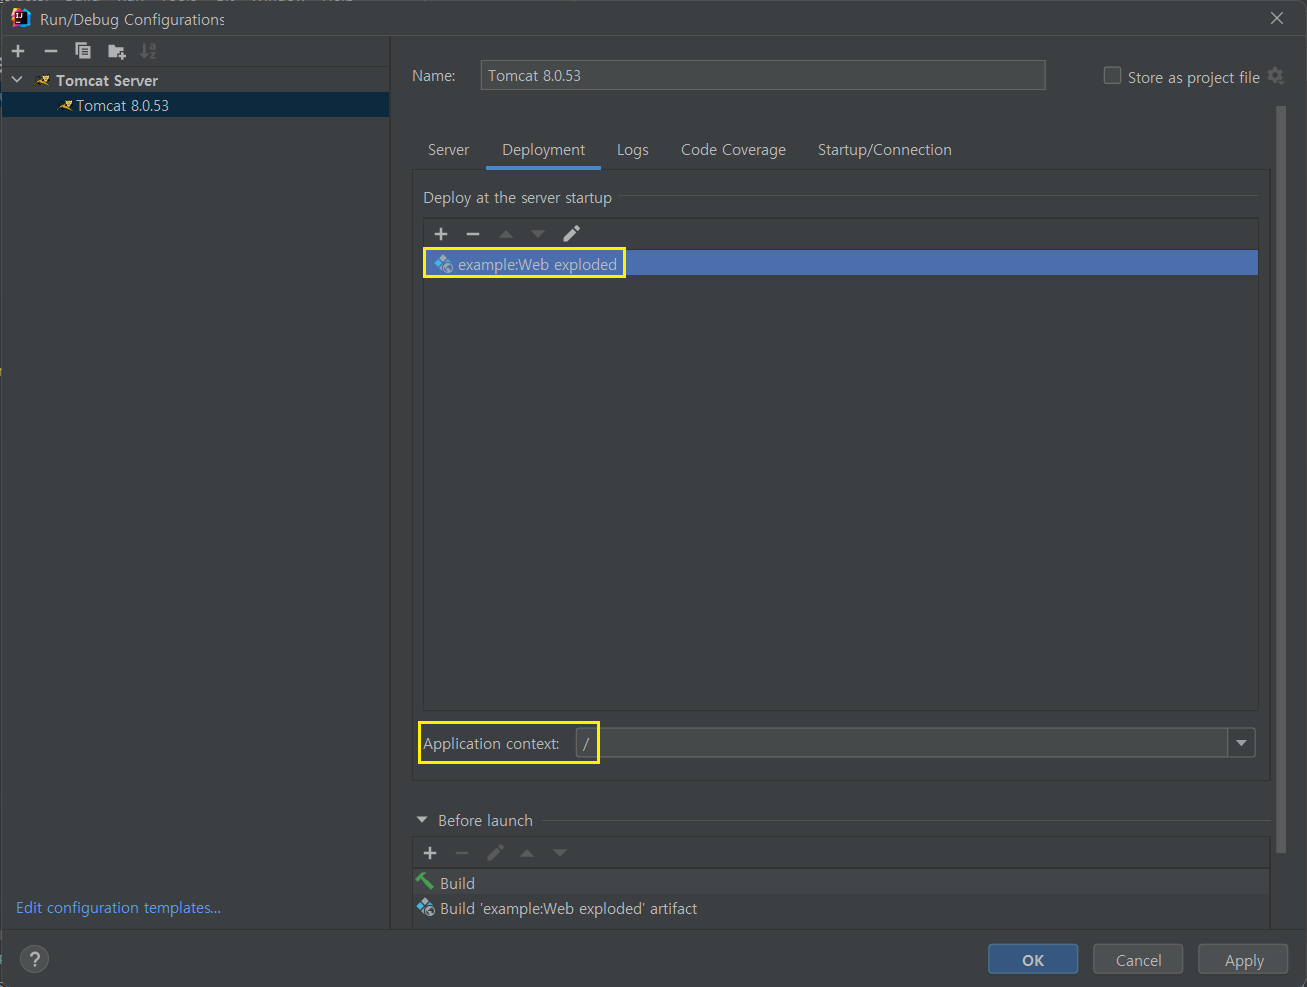
Deployment > + 클릭 > Artifact...

Application context: /
- root를 /로 변경
tomcat 설정이 끝났으면 프로젝트 실행하기
- 아래 그림의 빨간색 블럭을 클릭하거나
- Shift + F10 단축키 = 실행(Run)

실행 (Run Project)
index.jsp 파일 코드를 읽어옴.
(아마도 .. 따로 jsp를 설정해주지 않으면 나오는 기본설정인 거 같다..)
더보기
<%@ page contentType="text/html;charset=UTF-8" language="java" %>
<html>
  <head>
    <title>$Title$</title>
  </head>
  <body>
  $END$
  </body>
</html>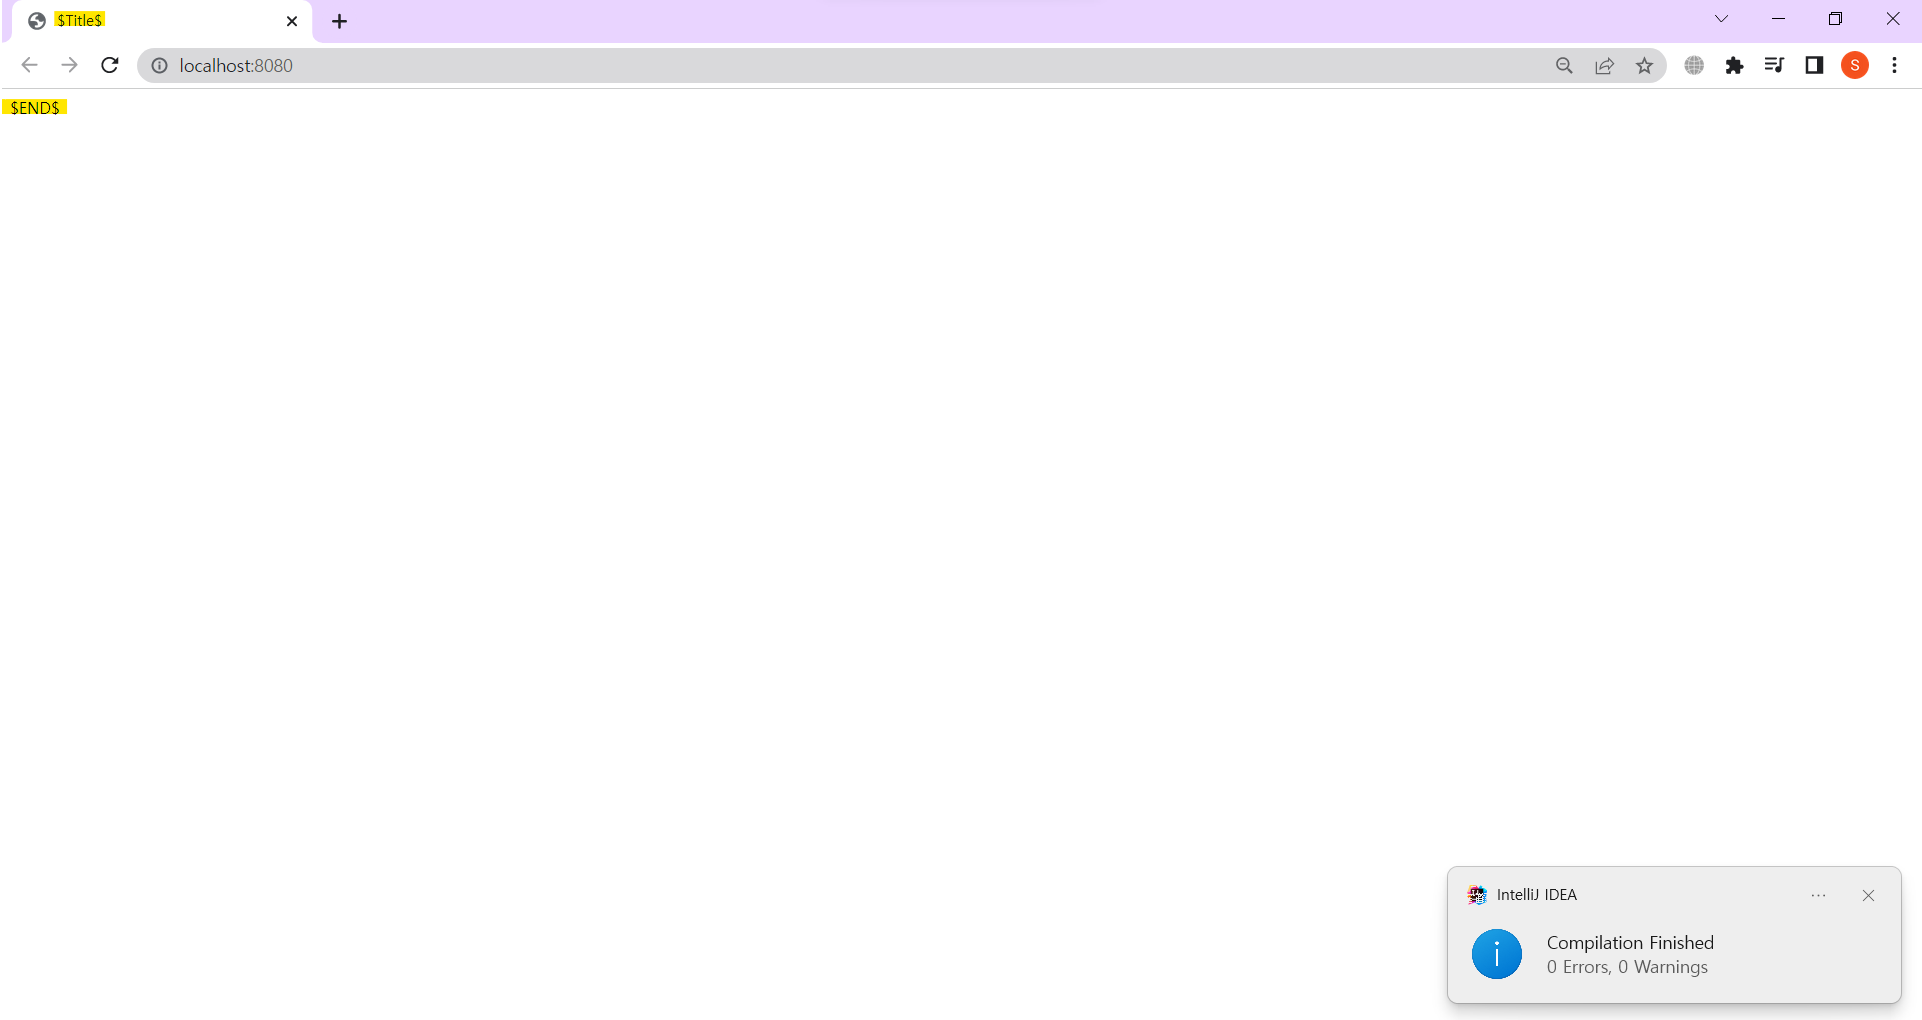
728x90
반응형
'Java > Spring' 카테고리의 다른 글
| Spring - pom.xml에 dependency 세팅하기 (0) | 2022.07.05 |
|---|

